I’m slowly getting through all the photos I have collected and snapped when I thought it would be fun to share or teach other people who aren’t that creative how to do stuff, you know, stuff, this is one of those times just like the time I did “How to make a Robot Head”, but this time it is how to make clues for your treasure island pirate party.
We had our daughter’s birthday party with a few friends over and the theme was pirates obviously, so we set them up down stairs with a TV playing “The Goonies” on DVD, an XBOX with a few games, fizzy drinks, party snacks, ping pong table, outside was slip n slide with the sprinkler running and finally to add to the day was the treasure hunt.
We have done treasure hunts before for Easter and the like but nothing like a pirate treasure hunt though.
So I thought I’d share how I made the clues with you as it is pretty easy.
I learnt this skill from memory back when I was in Kawerau growing up during my early years at school and it is one I haven’t forgotten about through the years, so finally, a treasure island pirate party to bring out my skills.
What do you need to make the treasure hunt clues?
- Computer with printer or a black pen
- A4 white print paper
- Scissors
- Lighter
- Tea bag
- Coffee mug
- Water
- Kettle
- Coffee
I started with writing the verses on the treasure hunt cards on word on the computer.
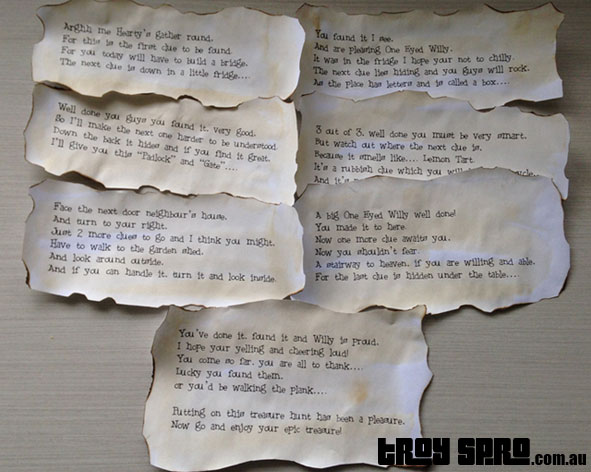
As you can see there are seven cards which means we had to find six places to hide the next clues, this was part of the process as I had to write in rhyme where the next clue would be found.
I typed these into a word box in word on the computer and then copied the box, pasted it, deleted the text and typed in the next lot of clues.
So I ended up with seven boxes on the screen fitting on one A4 size of paper, then I printed it.
At this point too, I should add, pick a cool treasure island pirate party looking font to use for the clues.
Next for me was grabbing the scissors and cutting out each clue into a rectangle shape.
So at this point you end up with seven rectangle shaped pieces of A4 printing paper with your clues printed on them.
Now the fun starts.
Head outside and take your lighter with you, hold the edge of one clue and ignite the lighter so you get about half a flame.
Then hold the flame on the edge of the paper until you get a slight flame happening, at this stage I have to say keep an eye on the flame and don’t get distracted as you will find yourself having to print out the sheet again.
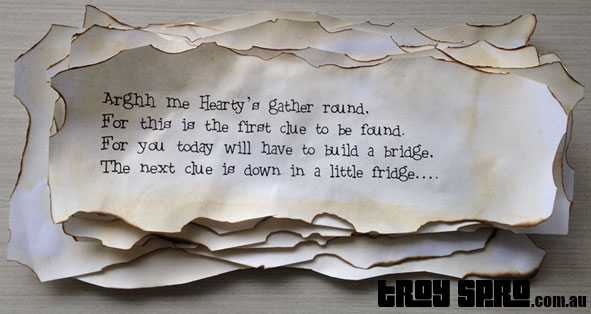
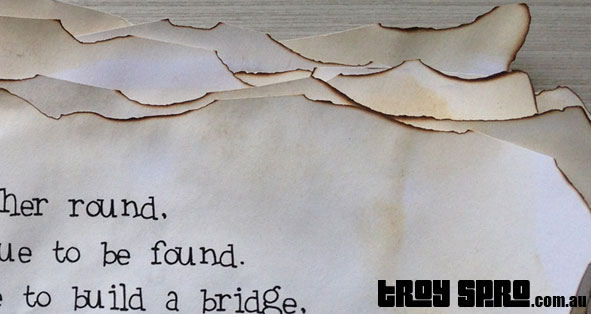
Let the flame burn a little and then put it out with your fingers, scrape and pick off the charcoal on the edges and slowly do this around all the edges on the clues.
As you can see by the pictures you have to do this for every edge on all of the clues and it is probably the most time consuming part other than thinking up the clues itself.
Make sure you are outside doing this for a few reasons;
- You may set off the smoke alarms in your house and you will get in trouble from the bride
- It makes a bit of mess with the charcoal and if you are making mess inside you will get in trouble from the bride
Also outside I had a wet rag handy too, just in case the flame got a little too out of control and I needed a bit more fire power in putting it out if the fingers were getting hot.
Now, head back inside after sweeping the charcoal off the deck and fill the coffee mug with cold water out of the kettle and dip the tea bag into the water.
When you pull the tea bag out give it a squeeze until a fair amount of the water has come out and then paint the clues with it.
I would dip the tea bag in, give it a bit of a squeeze and then hold the top of the bag where the string connects to the bag and drag the bottom of the bag up or down the clues.
Also, make sure you don’t go too much over the clues you have printed too much as there maybe some running of the ink and you want to prevent this as much as you can.
Just gauge what colour or how dark you want to go here and also be aware that the tea bag at anytime may split and you will have to get another one.
Line the clues up on your bench to dry and leave them alone until they are completely dry, this may take 10 minutes.
There you have it, you have made the Treasure Island Pirate Party clues for the kids, now you just have to hide them and also stash the treasure at the end.
I got each kid to read out the clue to the others as they found them up until the final clue when they found the treasure and it was an awesome half hour exploring the outside of the house.
So I hope all this makes sense, they are pretty easy to make and they look great too, if you have any questions about making clues, leave a comment below.
Oh, almost forgot the last step, when you complete making the clues and they are drying, put the water in the kettle and boil, put a teaspoon of coffee in the coffee mug, pour the boiled water into the mug and then enjoy a hot cup of coffee, sit back and admire what you have done for the kids and imagine the smiles on their faces.
Enjoy!


